Welcome to week 9 of The Blocks From the Past Quilt Along!

(If you would like to post this button to your blog, feel free to use this graphic and here is the link address to use with it- http://myquiltdiet.blogspot.com/2015/01/blocks-from-past-qal.html)
This week we are hanging out here where Ginny will be guest posting HERE on my blog and teaching us about pages 21, 22, & 67
Ginny
Page 22 -- Surely Ellen

I am not a fan of bias edges, so I sewed the 2 3/8 " squares together instead of cutting them in half. Draw a diagonal line and sew scant 1/4" on both sides of the line. Then cut on the diagonal line.
 Square up the little squares and trim off the little corners that will be dog ears if you don't.

That makes the half-square triangles that are in the center parts of the 4 squares here. Then just sew the B strips between these squares and put the BFB strip together for the middle row and assemble the block.
Page 21 -- Spool and Bobbin
The E blocks for this block are half-square triangles. So the above directions will come in handy again. Then the small parts that make up half of a triangle for the ABC block.

Just remember that you will be working with pieces that have a bias edge and handle carefully. Sew the straight edges to the small square.

Press gently so as not to stretch that bias edge. Then you can sew the bias edge of the larger triangle to this new pieced triangle and you have the elements of the block to put together.

Assemble the four of these and then put them together to make the finished block.

Page 67 -- Laurel Spray
The pattern suggests making yo-yos for this applique but they are so small mine just made a ball.
So I will show how to use a fusible interfacing to make these small circles.

First, I marked a 1/4" seam allowance around the circles. And then sewed them right side of fabric to the sticky side of iron-on interfacing.
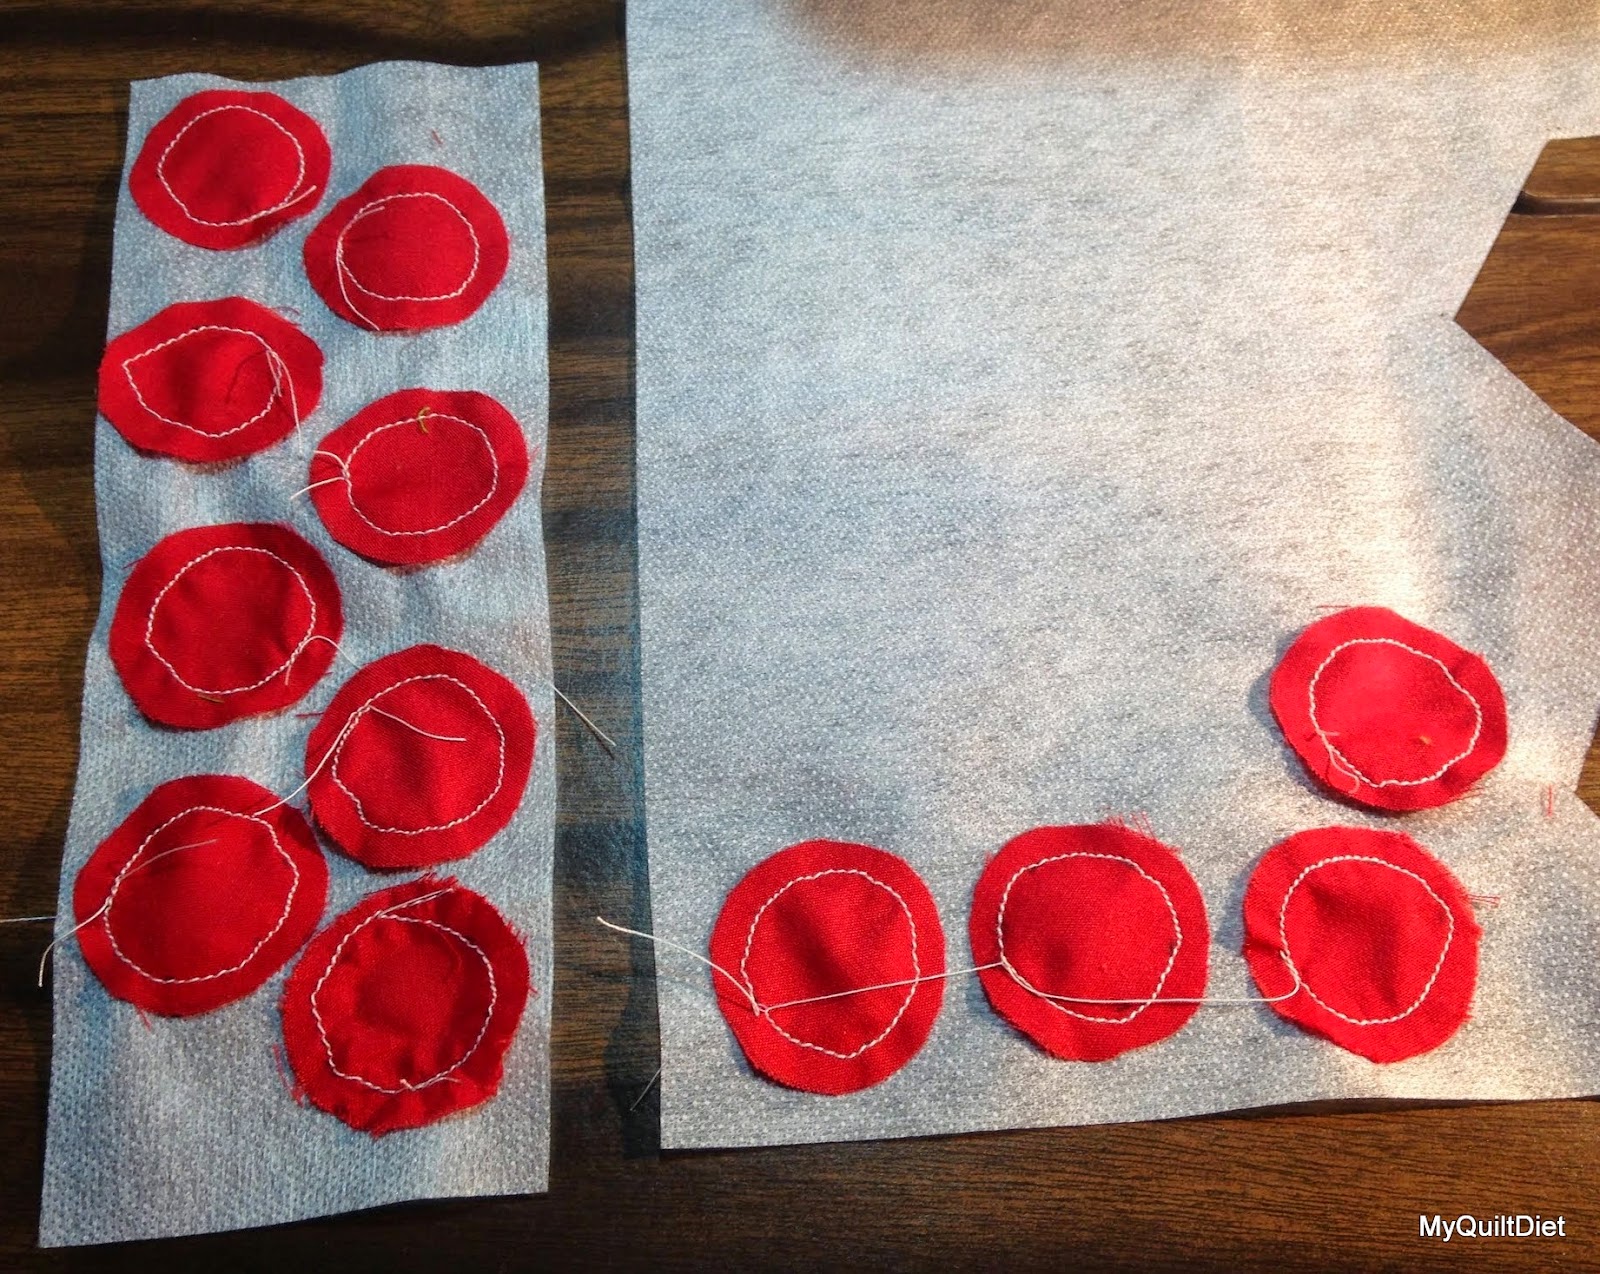
Then I trimmed them and clipped the curves carefully to the stitching line.

Turn over the circle and carefully snip a small opening in the interfacing. Turn the circle inside out.

DON'T PRESS THIS FLAT!! Just do some finger pressing and now you have smooth-edged circles ready to be appliqued on the background block.

I just followed the pattern directions to prepare the stems.
For the leaves on this block I used the freezer paper method to prepare. Just cut out the leaf shapes in freezer paper, Press with an iron to the wrong side of the fabric and cut out 1/4" beyond the freezer paper. Applique these on the background. April with April Mae Designs at April-makingendsmeet.blogspot taught me a slick trick for using the freezer paper too. Her site is unavailable at the moment but should be back soon. Basically it involves using a small paint brush, liquid starch (diluted) and moistening the seam allowance beyond the freezer paper and pressing it up. This helps stabilize it while you are sewing it on. Thanks April for the great tip!

When all the applique is finished. turn over the block and very carefully slit behind each leaf and lift out the freezer paper with a pair of tweezers.

The gallery of the other blocks I have finished so far for this quilt. My theme is following the colors as they flow through a rainbow. Cross you fingers that it works out. It is the first time I've designed a quilt.


I am not a fan of bias edges, so I sewed the 2 3/8 " squares together instead of cutting them in half. Draw a diagonal line and sew scant 1/4" on both sides of the line. Then cut on the diagonal line.
That makes the half-square triangles that are in the center parts of the 4 squares here. Then just sew the B strips between these squares and put the BFB strip together for the middle row and assemble the block.
Page 21 -- Spool and Bobbin
The E blocks for this block are half-square triangles. So the above directions will come in handy again. Then the small parts that make up half of a triangle for the ABC block.
Just remember that you will be working with pieces that have a bias edge and handle carefully. Sew the straight edges to the small square.
Press gently so as not to stretch that bias edge. Then you can sew the bias edge of the larger triangle to this new pieced triangle and you have the elements of the block to put together.
.JPG)
Assemble the four of these and then put them together to make the finished block.
Page 67 -- Laurel Spray
The pattern suggests making yo-yos for this applique but they are so small mine just made a ball.
So I will show how to use a fusible interfacing to make these small circles.
First, I marked a 1/4" seam allowance around the circles. And then sewed them right side of fabric to the sticky side of iron-on interfacing.
Then I trimmed them and clipped the curves carefully to the stitching line.
Turn over the circle and carefully snip a small opening in the interfacing. Turn the circle inside out.
DON'T PRESS THIS FLAT!! Just do some finger pressing and now you have smooth-edged circles ready to be appliqued on the background block.
I just followed the pattern directions to prepare the stems.
For the leaves on this block I used the freezer paper method to prepare. Just cut out the leaf shapes in freezer paper, Press with an iron to the wrong side of the fabric and cut out 1/4" beyond the freezer paper. Applique these on the background. April with April Mae Designs at April-makingendsmeet.blogspot taught me a slick trick for using the freezer paper too. Her site is unavailable at the moment but should be back soon. Basically it involves using a small paint brush, liquid starch (diluted) and moistening the seam allowance beyond the freezer paper and pressing it up. This helps stabilize it while you are sewing it on. Thanks April for the great tip!
When all the applique is finished. turn over the block and very carefully slit behind each leaf and lift out the freezer paper with a pair of tweezers.
The gallery of the other blocks I have finished so far for this quilt. My theme is following the colors as they flow through a rainbow. Cross you fingers that it works out. It is the first time I've designed a quilt.
Marion here :) This is what I completed this week :) ...it nearly KILLED me and I almost quit my own qal ;) I DO NOT recommend working on these blocks when you are sewing with a bunch of your friends! It nearly drove me batty!
Fortunatly, Barbie made three of my applique. She used a fusible method, I think I am going to use her method from now on.
It is SO fast and looks so good!
Click HERE to go back to the Schedule Post. Be sure to tag your progress on Instagram with #BFTPqal. You can also join our Flickr group HERE.

No comments:
Post a Comment
Thanks for leaving your thoughts! I LOVE to hear from you :) I cherish every word :) I read ALL of your comments and try to reply to every single one.... but it sometimes takes me a few days xoxo
***If I don't get back to you, it is likely that you are a "No Reply Blogger" :( ***